

Hello!
I’m back today after completing a youtube tutorial on highlights and shading by Dom Designs. I’d like to share the process with you.
I’ll be following along the tutorial but my explanations may deviate a bit from the source material, so use my pictures to keep on track!
Check out the bottom of this post for a list of keyboard shortcuts that I use in this tutorial.
Here we go!
Circle Body
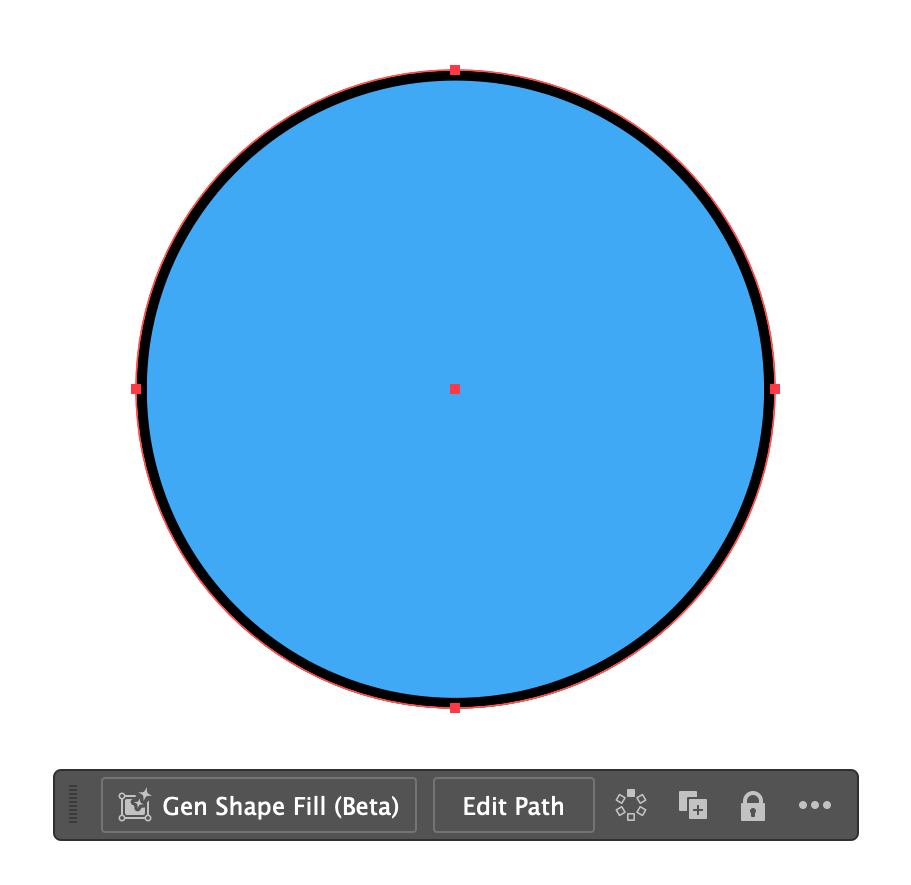
First, you’ll need to draw a circle in an Adobe Illustrator document. Use (L) to select the ellipses tool and draw a sphere by holding shift and dragging.
You’ll want to copy your first circle with (Command + C) and paste it to the back with (Command + B).
We’ll need two circles because one will be for the fill and the other for the stroke. Keep the stroke circle on top and the fill circle on the bottom.
With the fill circle still selected, go to the Layers tab and drag the little colored square in your current layer to the layer under it. That will allow us to edit the fill circle all we want while leaving the stroke circle alone.
Highlights
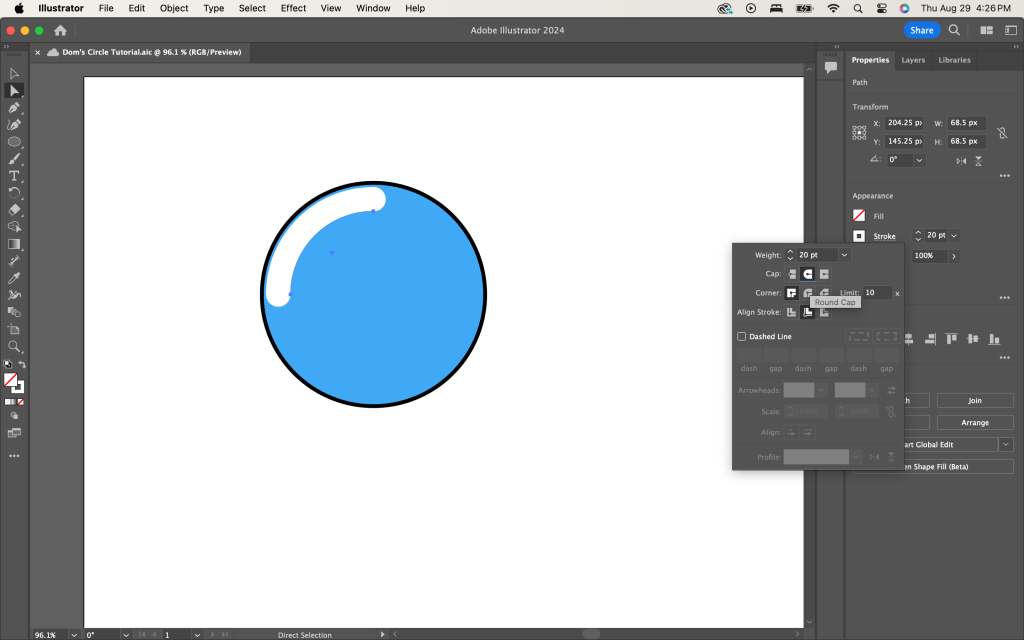
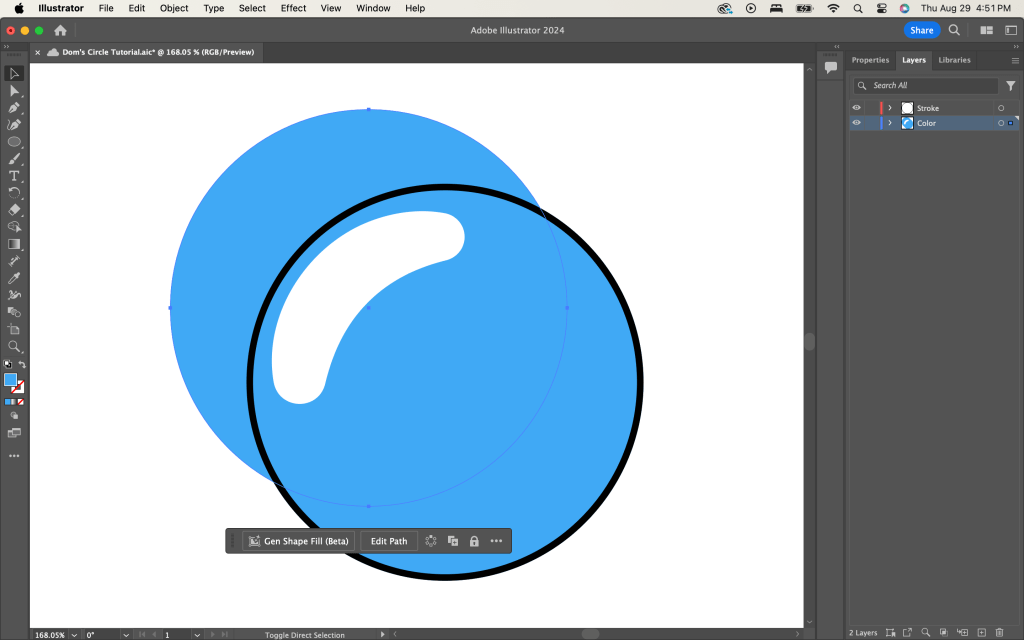
To make the highlight on the ball, we’ll need to copy and paste the fill circle to front (Command + F).
Shrink the circle by dragging the corner handles while holding shift. Modify it to remove the fill and add a white stroke.
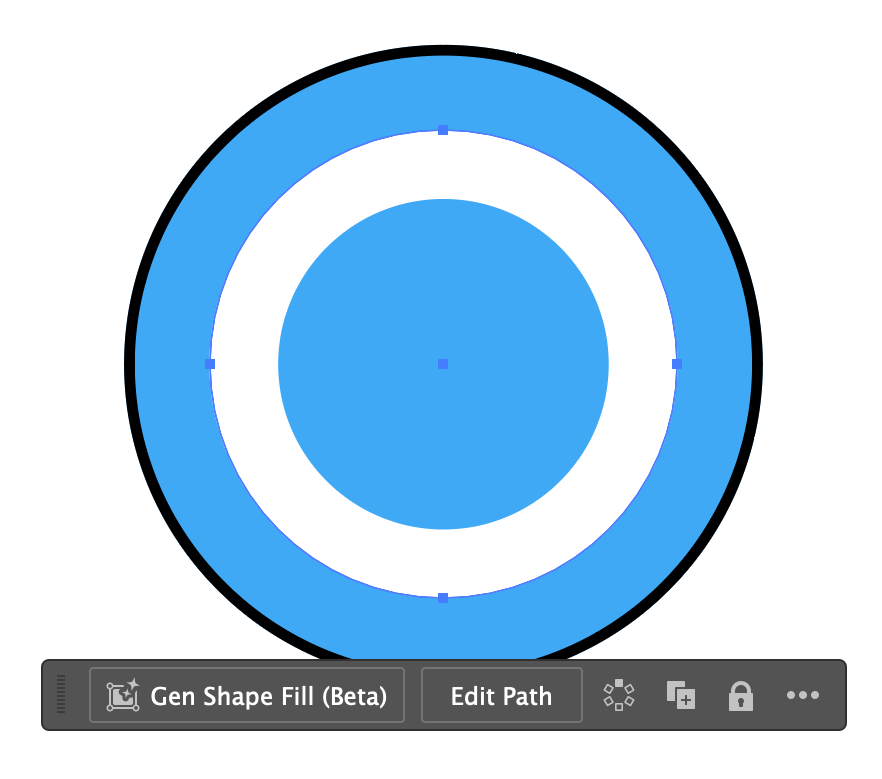
Use the Direct Selection (A) to select two of the anchor points and delete them, leaving only one path segment.
If you look closely, you can see the path of the highlight is aligned to the inside edge. Make sure your stroke is set to the round cap and the alignment is sent to center.
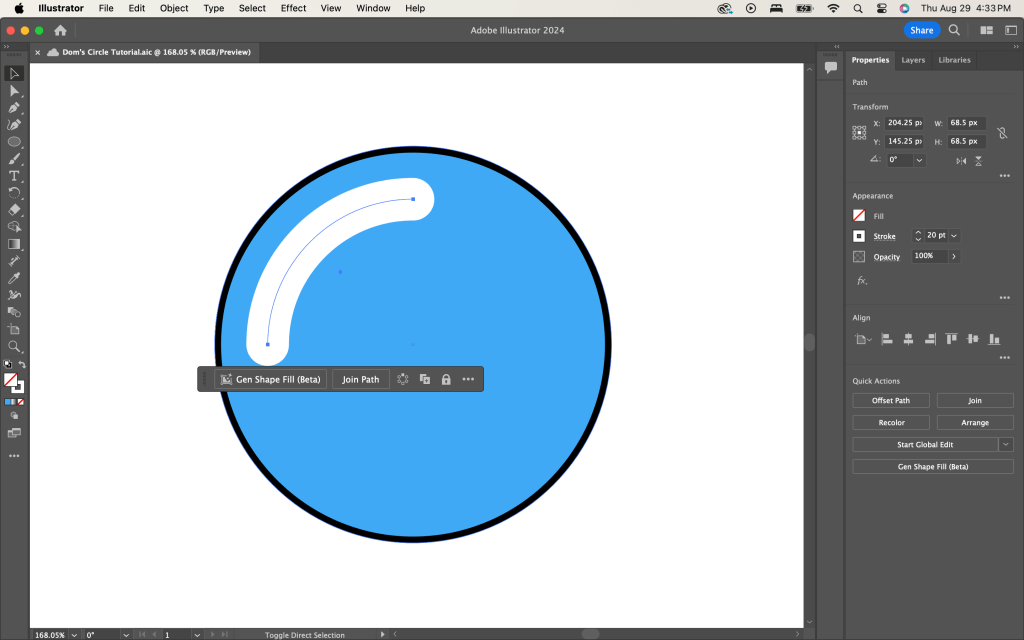
Without the stroke aligned correctly, you wouldn’t be able to use the Width Tool (Shift + W). Click on the highlight’s path with the tool and drag to pull out the handles.
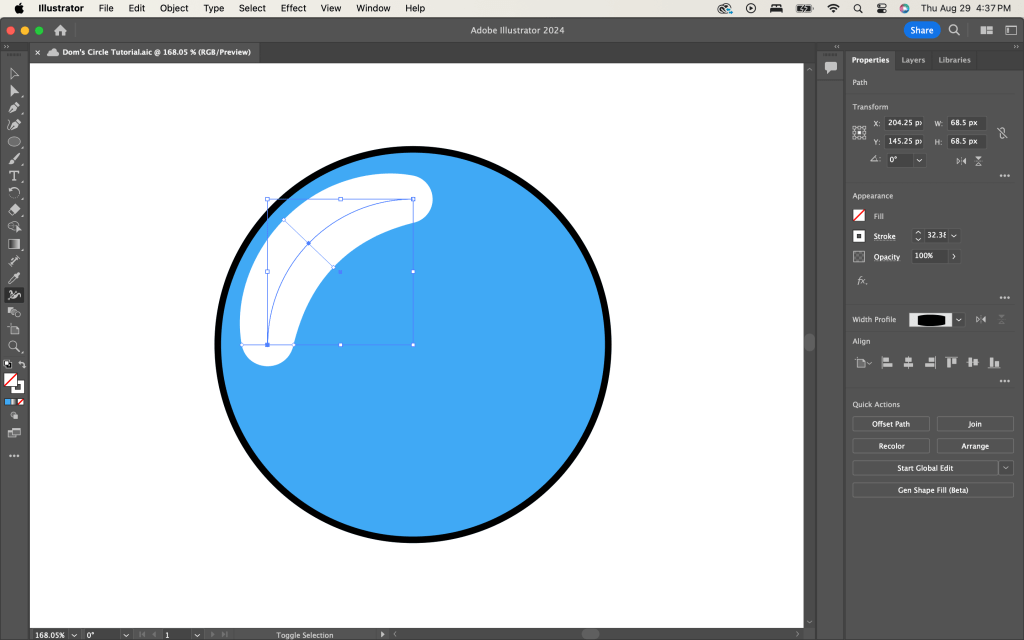
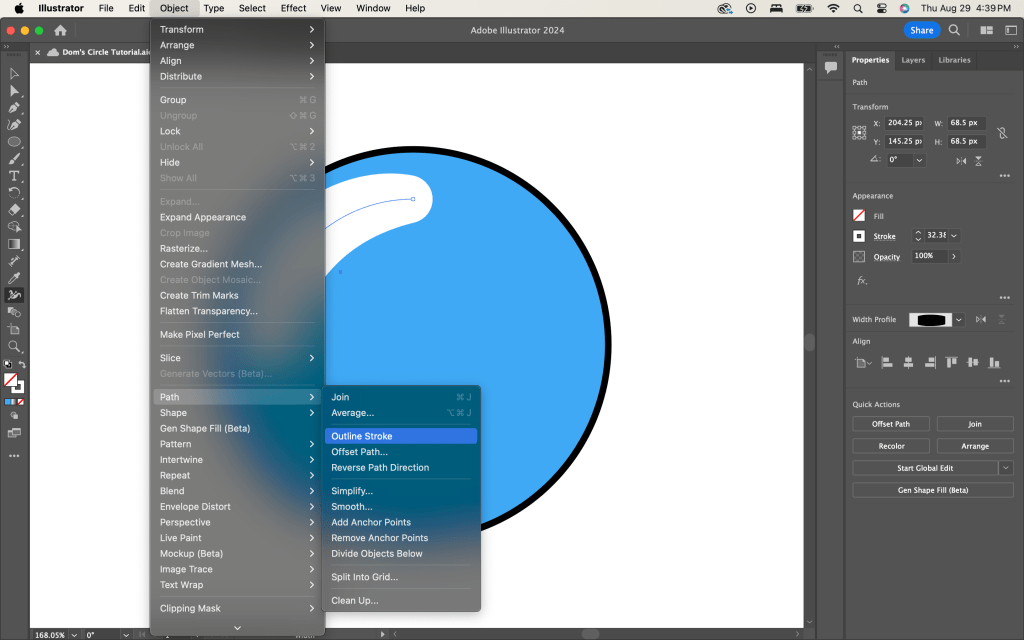
With the highlight stroke still selected, navigate to Object > Path > Outline Stroke. This will transform the stroke into a shape!
Shadows
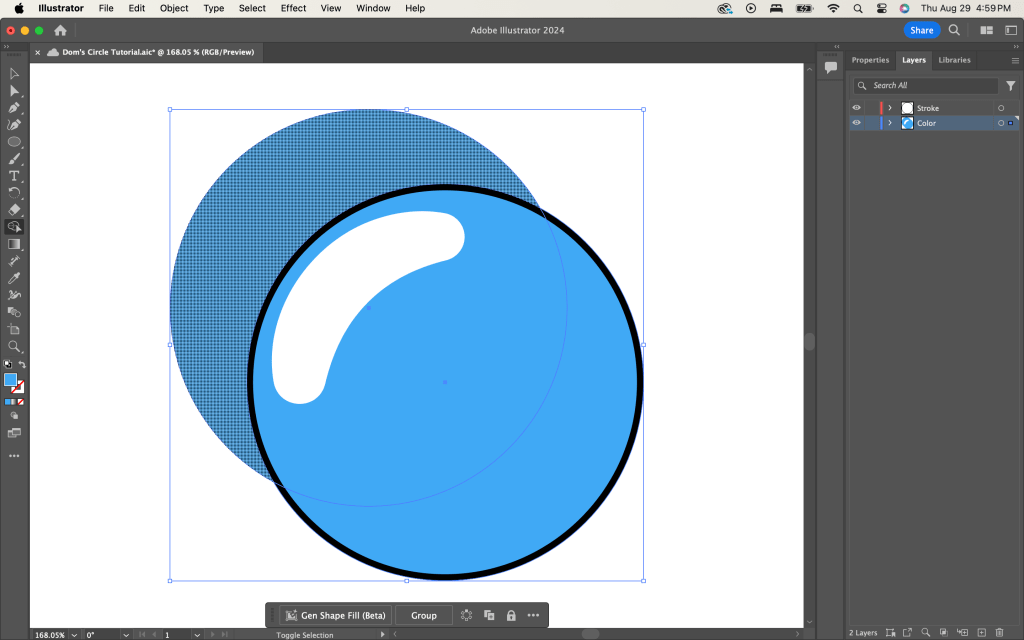
To complete the shadows, go back to the fill circle. Copy and paste it to the back twice. You should now have three fill circles on top of each other.
Move one circle up to the left and leave it hanging outside the stroke but overlapping the fill circle.
This duplication and overlap will help us cut out the crescent shape we need to make the circle seem like a sphere.
Now, select the Shape Builder Tool [Shift + M].
Toggle the tool by holding Option and delete the overhanging shape by clicking with the toggled tool on the shape.
Then, use the tool again in the additive state on the crescent segment. Make sure both fill circles are selected while you do this.
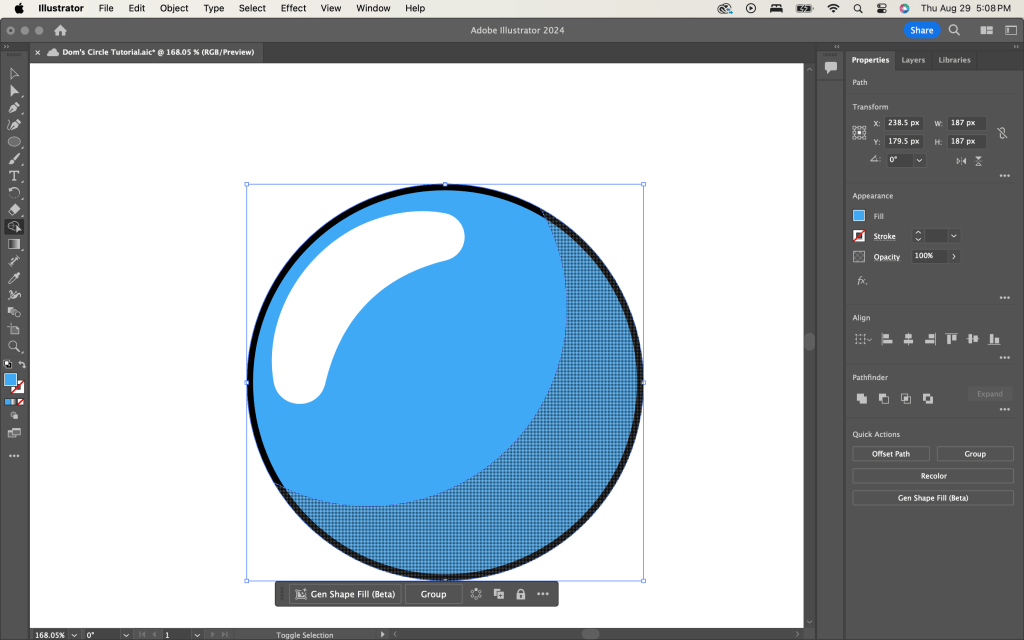
Now select the present shape and adjust its opacity and fill to your liking. I like my shadows to be a deep purple and my shadow’s opacity at 50%
Feel free to add a shadow on the ground using the circle tool again with a higher opacity.
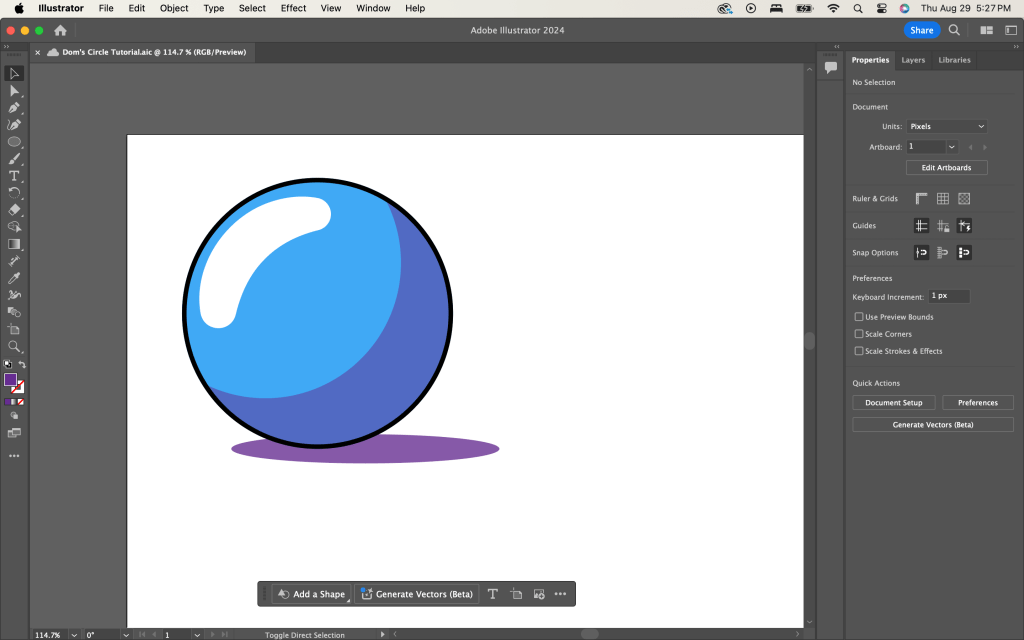
And you are done! When positioning the shadows and highlights, make sure to keep in mind where the fictional light source would be coming from.
Reflections
I learned a lot from this tutorial!
The shape builder continues to be a very useful tool. I’m sure you’ll see me use it more on future projects.
I wonder how viable duplicating shapes to create cutouts will be on more complex projects. I will need to try it and see.
Check out the section below where I detail the keyboard commands that stood out to me this tutorial.
Thank you for reading!
’till next time!
Keyboard Shortcuts
For macos
| Paste to Back | Command + B | |
| Paste to Front | Command + F | |
| Width | Shift + W | Make sure the stroke you want to widen is centered on its path. |
| Make Stroke into Shape. | Object > Path > Outline Stroke | Not a keyboard shortcut, but still important. |
| Shape Builder | Shift + M | Toggle the tool to subtract by holding Option. |

Leave a comment